
Help The Camera Explain The Home
Good preparation lets a buyer understand the room: its shape, windows, usable floor space and relationship to the next area. The goal is a clear, appealing record of the real home. Cleaning and rearranging can help; hiding a defect or making the room look like a different property cannot.
Start with a slow walk from the entry through the main rooms. Take a few ordinary phone photos from doorways. On the small screen, look for the first thing that catches your eye. Is it a window and seating area, or a laundry basket, cable and chair back? This is a useful editing test before professional photography, not a replacement for it.
Vancouver condos often combine living, dining and kitchen space in one view. An object that seems harmless in one zone can interrupt the whole photograph. Prepare the connected area together and keep the real route to the balcony visible.
Reposition Before You Remove
A home does not need to be empty to look spacious. Keep furniture that explains how the room works, then adjust anything that blocks a useful view or route. A sofa, chair and appropriately scaled table can communicate a seating area more clearly than a bare floor or an oversized sectional.
Before: A Blocked View
The chair fills the middle distance and interrupts the route toward the glazing. Its back can dominate a doorway photograph.
Better: A Clear Connection
The chair joins the seating group and the eye can travel toward the windows. Check the actual door swing and comfortable circulation.
Original conceptual plans, not measured layouts or photographs of a listing. Blue indicates glazing or a clearer route. Furniture positions must suit the actual room.
Scale And Sight Lines
If a room is overfilled, temporarily relocate an extra ottoman or side table to a safe place outside the shoot. Keep enough seating to show the purpose of the space. Do not hide all storage furniture if it is essential to how the home is used; edit its surface and position instead.
Look at the rug, too. A rug that relates to the seating can define the living zone in an open plan. A small mat floating under only the coffee table can draw attention to disconnected pieces. The furniture-layout guide explains grouping, circulation and scale in more detail.
Clear Surfaces Without Removing Every Sign Of Life
Before: Many Small Distractions
Several unrelated items compete for attention and make it harder to see the work surface.
Better: Space Around A Simple Group
One restrained group leaves usable counter space visible. This is an editing concept, not a rule requiring particular accessories.
Kitchen
Clean the sink, faucet, backsplash and appliance fronts. Remove dish racks, drying cloths, loose packaging and fridge magnets. Put small appliances away where practical, keeping a simple item only if it helps the room feel usable. Do not crowd the counter with decorative objects to replace the clutter.
Entry And Personal Items
Keep the door able to open normally. Store excess shoes, umbrellas, bags and bulky outerwear; straighten the mat and leave a usable landing surface. Remove visible bills, family identifiers, calendars, medical items and passwords. Protect private information before photos are taken, not after the listing is published.
Plan a temporary holding area for belongings. A closed cupboard may work for photography, but it should remain orderly enough for later showings. Do not stack boxes where they will block the photographer, a hallway or an exit.
Prepare The Rooms With The Most Small Details
Bedding
Pull the duvet or cover evenly, align pillows and check the visible bed base. Use a restrained arrangement rather than a tall pile hiding the headboard. Clear laundry and items under the bed that show from a low camera angle.
Bathroom
Clean glass, mirrors, fixtures and grout surfaces. Remove toiletries, cleaning products, bath mats and spare rolls from view. Close the toilet lid, hang neat towels and keep one simple soap dispenser if appropriate. Report repairs that are needed rather than styling around them.
In bedrooms, leave the bed's relationship to doors and windows easy to read. Straighten bedside lamps, remove charging leads and simplify shelves. A mirror may reflect clutter from another part of the room, so check what appears in it from the doorway.
Prepare For Vancouver Light, Not Just A Sunny Reference Photo
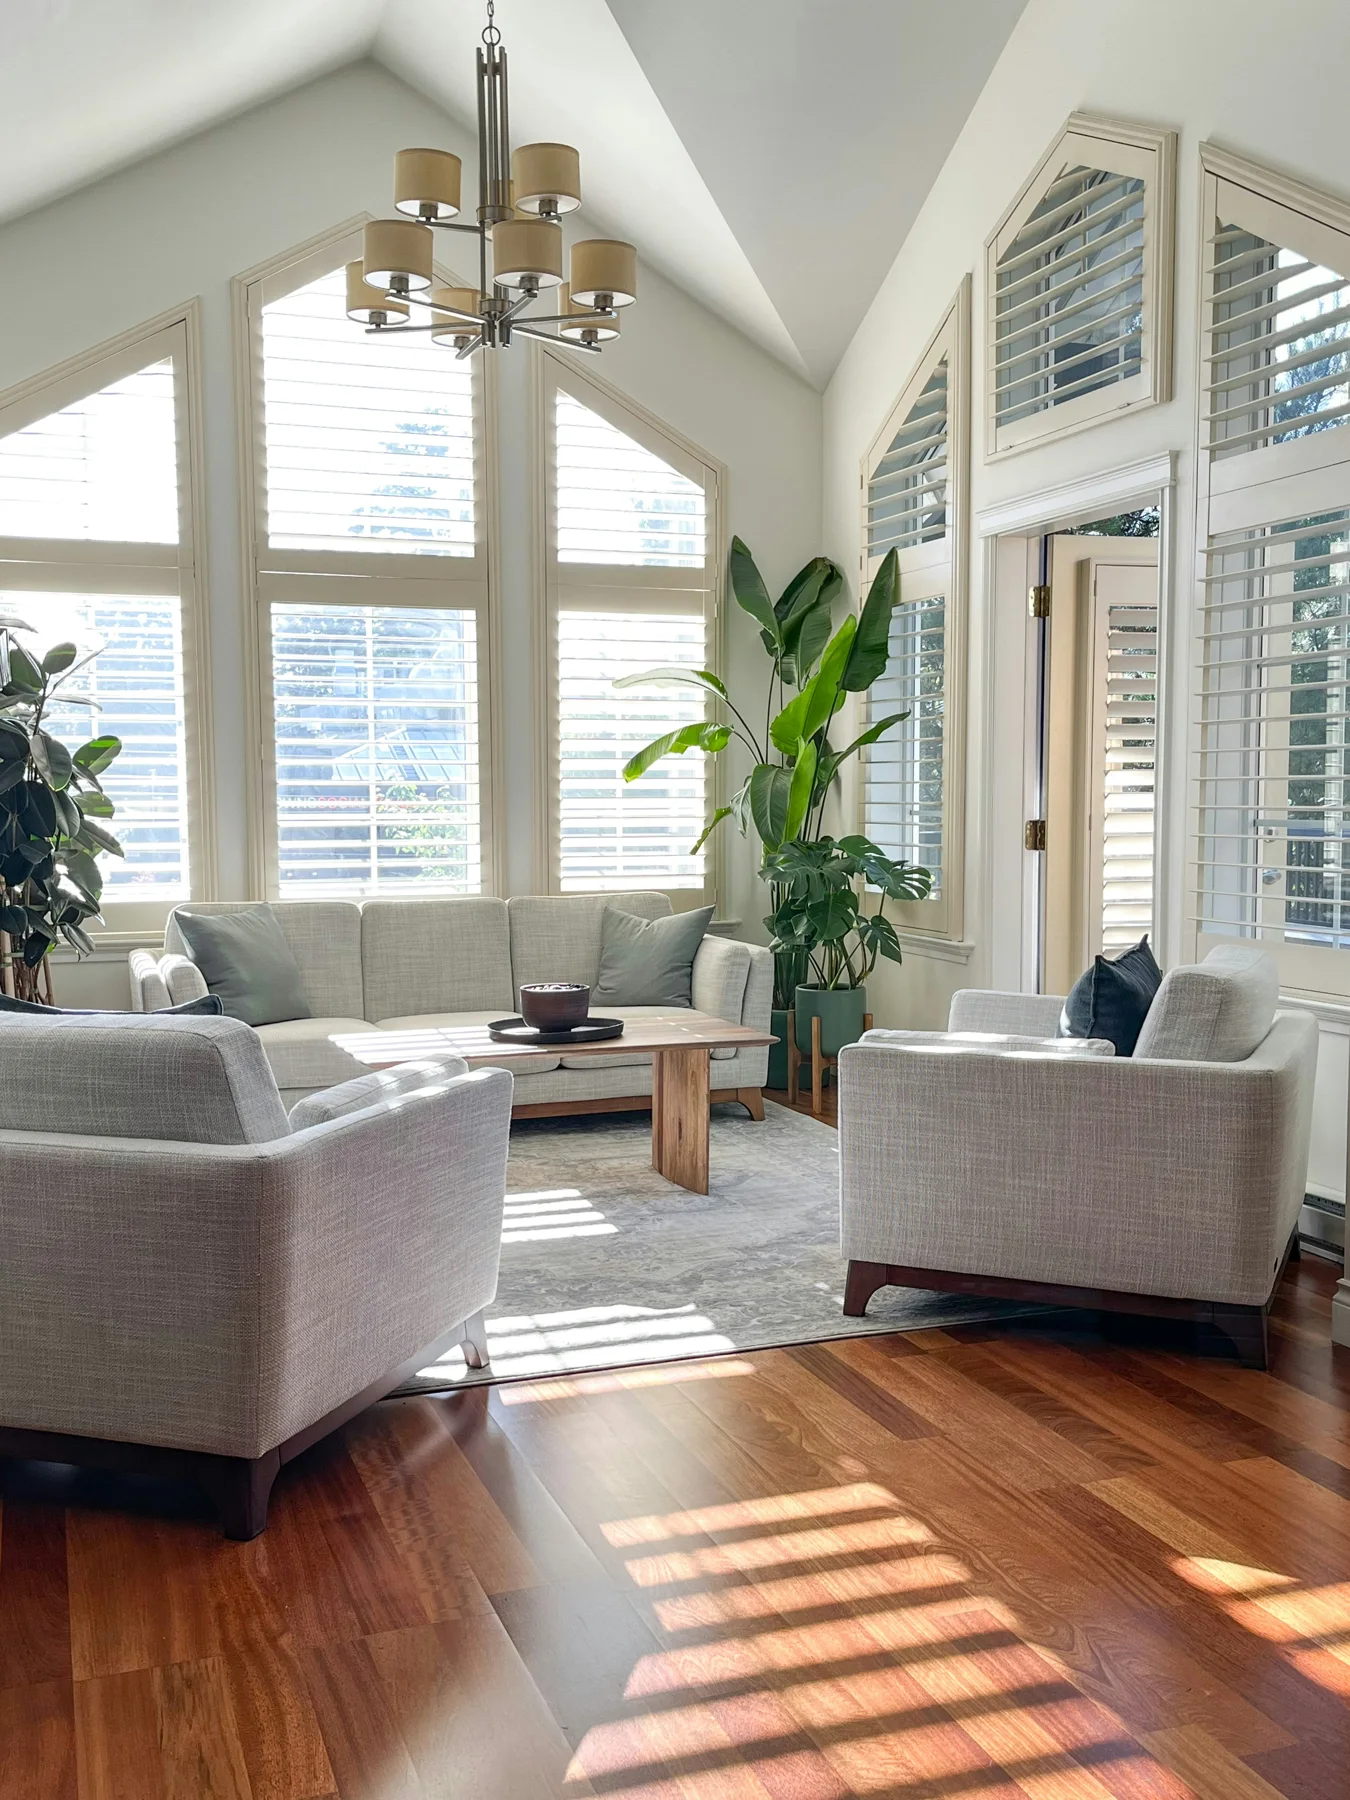
An overcast afternoon, direct west sun and a shaded north-facing room need different decisions. Clean accessible glass, straighten curtains and make sure coverings operate. Open them enough to explain the window and admit useful light, then let the photographer refine the position to handle glare and contrast. Do not remove a functional covering solely to create an unrealistic photograph.
Before
One blind is closed, another tilted differently; a cool lamp contrasts with a warm lamp; cables and bulbs attract attention.
Better
Coverings are aligned, working lights are ready and the photographer chooses which lights to use. The room's actual daylight remains understandable.
Check that bulbs work and flag inconsistent colour temperatures. Avoid last-minute untested replacements that change the room's colour. Discuss lighting with the photographer; switching every light on is not always the best result. More on room orientation and colour appears in the natural-light and paint guide.
Balcony Or Patio
Sweep the accessible surface, straighten furniture and remove empty pots, packaging and cleaning tools. Keep a small usable seating arrangement when space allows. Leave drains and exits unobstructed, and do not move heavy planters or alter common property without the appropriate permission. Check the indoor sight line through the door as well as the outdoor photograph.
24 Hours Before Photos
Do the work that should not be rushed while the photographer waits.
- Confirm the arrival time, access, parking instructions and rooms being photographed.
- Clean floors, counters, mirrors and accessible glass; let damp surfaces dry.
- Reposition furniture and check actual door swings and walking routes.
- Prepare bedding and towels; remove excess items from kitchen and bathroom surfaces.
- Test blinds, lamps and bulbs; tell the photographer about lighting or access limitations.
- Remove private documents, identifying personal items and visible valuables.
- Prepare the entry and accessible outdoor space, keeping drains and exits clear.
- Choose a safe storage area and arrange for pets and occupants during the shoot.
- Take doorway test photos and check reflections, visible cables and the edges of each frame.
- Address minor presentation issues you can safely resolve; disclose unresolved property problems appropriately.
10 Minutes Before The Photographer Arrives
- Put away fresh dishes, laundry, waste bins and pet accessories that entered the prepared rooms.
- Smooth bedding and cushions; straighten rugs and chairs.
- Close toilet lids and clear the last toiletries.
- Align window coverings and have lights ready for the photographer's direction.
- Remove charging cables, bags and keys from the visible surfaces.
- Open the intended interior doors and keep the route through the home clear.
- Check mirrors and reflective appliance fronts for distractions.
- Secure pets, protect valuables and confirm access without blocking exits.
Then stop moving things unless asked. The photographer may have a sequence planned, and a basket shifted from room to room can keep appearing in the next frame.
Keep The Photographs Honest
Presentation should help people recognize the property when they visit. Discuss any proposed virtual staging or material image alteration with the professionals responsible for the listing, including clear disclosure where appropriate. Do not remove a permanent obstruction, defect or building feature digitally to create a misleading impression.
After the shoot, preserve the main furniture arrangement and level of preparation for showings where practical. A photograph is an introduction to the real space; the in-person experience should make sense alongside it.
Preparation References And Image Credit
- NAR: camera perspective and photo preparation
- NAR: staging and image-alteration disclosure
- Jake Goossen: the licensed BC interior photograph
Reviewed October 3, 2026. These US staging references support presentation concepts, not BC transaction rules. All comparison diagrams are original simplified illustrations.
Planning Your Photo Day?
If you would like help prioritizing preparation for your Vancouver home, contact Spencer before arranging the shoot.